Tutorial : Infrared photography

7 min read

Deviation Actions

zardo's avatar
By
Published:
537 Views
Hello,


Some of you asked me: " how I made my infrared photos ? ". Others wanted that I made a tutoriel on this photographic method. Thus here is a small guide to help you to realize your infrared photos.

In a first time, I have to indicate you that this tutoriel will apply only to Canon cameras. I know that Nikon gives better results with the infrared but the purpose of this guide is to help you to obtain an effect so nice.

So, What is the Infrared ?</u>

The Infrared show us a world that we can't see without a filter.

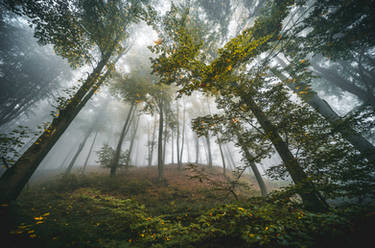
The Infrared gives the possibility to have a thermo effect. It is what you can see in these photo : white trees/clouds and some colored skies.

As I said higher, it's impossible to see infrared light without the filter. We can only see this effect with the filter.

Now the camera :</u>

Before, with the film camera, this method already existed. It was very difficult to obtain a good result and in 90% of the cases, the effect was missed or the film was burned.

Now with the digital camera, it is more easier and you can try and try again. However, it is not so easy ! The digital camera have an infrared blocking to have a beautifuler photo with some great colors.
Here, you have the possibility to remove this blocing-lens but for my part I ddidn't altered my camera.

So, How it works ? </u>

Ahah ! In a first time you need the more important piece on your camera : the infrared filter ! For my part, I use the Hoya R72. It is a good filter but there's some others.

Secondly, you need to know your camera. For the canon, the parameters depend from a camera to the other one. I spoke with some people who have a canon eos 300/350/400D and it is more easy to have a good effect with these models. I use a conon 30D and it is more difficult. But not impossible ! :D

After the filter, you need a tripod. Yes, the infrared photo need to be taken in a long exposure. So if you don't use a tripod, it will be difficult to don't move.

When you put the filter on your camera, you can't see anything. So you need to make the clarification before put the filter.

So you have your camera, your filter and your tripod, What to do now ???

First the ISO : I always work with an ISO of 200 maximum to take my infrared photos. If you put it higher, you have a risk of noice on your photo.

Second : the function : Work in all manual functions. In this way, you can control all the parameters of your camera. Put the speed on a long exposition of 25 or 30 seconds (it depends of the light). And take a maximum opening : F 2.8 or F 3.5

Use the timer if you have one.

The first step is to change the White balance. Take a photo of the green lawn or of the blue sky. After that keep the green lawn or blue sky as white balance.

Take your photo with : iso 200 / 25 seconds / F3.5 / timer / white balance personalized.

You have now a brunette photo. The effect is really good but you can have some different effect in post treatment.

The post-treatment : </u>

For the post-treatment, I use photoshop cs2. First open your field. Second edit the level and the contrast. After that use the : Image > Adjustments > Channel mixer. You see in first the red channel. The red is on 100 and the green/blue on 0. Change the red --> put 0 and the blue --> 100. After that, go to the blue channel and put the red on 100 and the blue on 0.  

If the white is a little bit red, you can go to Image > adjustments > Hue/saturation and lower the saturation of the red channel.

And voilà ! You have your Infrared photography. :boogie:

Here are some examples :


White tree by zardo In memory by zardo Watching the time passing by zardo


zardo

SOME OF MY PRINTS :

:shop1006405: :shop1006394: :shop868245:

:shop1159550: :shop1145639: :shop1129516:

:shop1297355: :shop1258929: :shop1248126:

:shop1273957: :shop1305456: :shop1300592:

:shop1414075: :shop1408015: :shop1405444:

:shop1420150: :shop1426529: :shop1430438:

:shop1469066: :shop1461954: :shop1454769:


There are more Prints in my gallery :) Just have a look : zardo.deviantart.com/store/


My girlfriend's amazing gallery:

:iconcaithness155:

I'm the operator/founder/administrator of this club :


:iconlandscapeclub:

I'm a member of :


:iconunseenartists: :iconfeatureshare: :iconmanipulators: :icondarkartists-inc: :iconfour-seasons: :iconeliteartists: :iconscapes-club: :iconr72: :iconnatures-beauty-club: :iconhdr-club:
© 2007 - 2024 zardo
Comments40
Join the community to add your comment. Already a deviant? Log In
arcticphoenixstudios's avatar
Thanks much for posting this! :) Now....I just need to save up and get the filters to try it. *lol*